Showing posts with label Crafts. Show all posts

Thursday, April 14, 2011

April Showers bring may flowers.

I found this cute little flower key holder the other day while surfing the net. It looked easy to make, and I already had a lot of the supplies around. A friend of mine just moved into a new place, and I thought it would be cute for the walls. Also, she loves books, so it was fitting. Here is what you need to make this flower bloom.

One book (one that you wouldn't mind cutting up.)
Mod Podge -or- Krylon Clear coat
Green paint
One wire hanger
Cardboard
Scissors
Paintbrush
Hot Glue
Pliers (something to bend the wire with.)

 First, you want to cut out a small circle to glue everything too. I just happened to have bought some Arizona Iced Tea, and it came in a little cardboard container with circles in the bottom. Any cardboard will do though.
Take your pliers and cut your wire to the desired length that you would like it.
The picture from the site had it twisted like this. The top circle is where you will hang it from.  (I started with this shape, then bent it out after I painted it. see below)
After cutting my wire, I took my dark green paint, and painted the stem.
 I ended up pulling it apart to look like this. The next time, I'll cut the wire longer, or make them in multiple lengths to group the flowers together. Hot glue your wire to the middle of the circle.
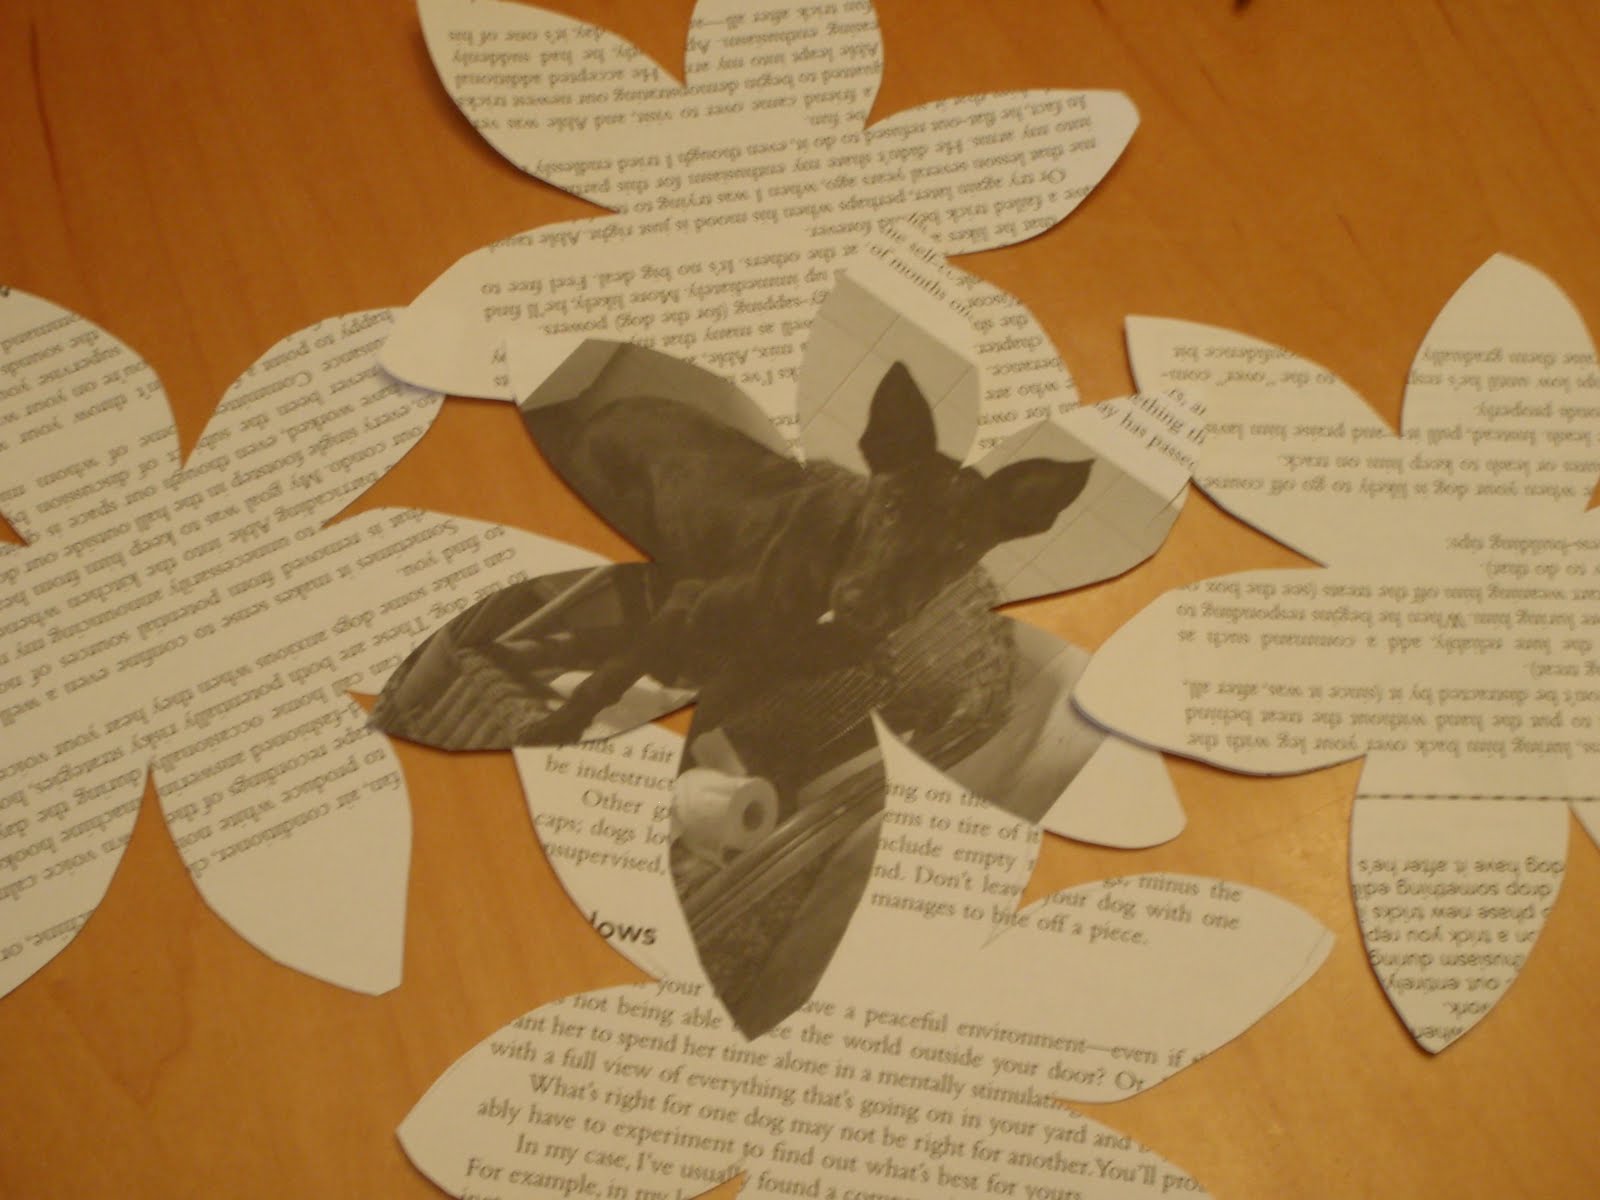
I then drew a flower, free hand, on one of the pages of the book. Then made 5 more like it. I mod podged all of them and waited for them to dry.
 Once dry, I placed them on top of each other, and spun each one a little bit, so that the flower was full.
 Staple your flower directly in the middle. This "center spot" is where you will fold your flowers into.
 Begin to fold up into the center. Your flower should start to take place.
 Silly side note: I didn't have any clear cote spray, I had hair spray, it worked well! :)
 This is your finished product.
 I think next time, I'll do different color paper to add some flare to it. Also, I will make the stem a little longer. Overall I love the look of it, super cute!
Enjoy!
Courtesy of Mark Montano

Thursday, March 17, 2011

Funky Abstract!

The animal hospital that I work at has pictures of animals everywhere. There are all different kinds of prints. We have some professional photos, cartoon type photos, and some photos of employees pets. We also have pics of some of the pets we have treated there that our clients have given us. In one of the rooms, there is this weird kind of abstract picture of a Pug. It's on a canvas, and it looks like it's half paint, half scrapbook paper. It's a little weird, but kind of cool looking. I was up for a challenge, so I decided to give it a shot. My sister likes giraffes. A year ago we went to a place called Lion Country Safari. I took a couple of cute pics of her feeding the giraffes there. One of the pics was a giraffe eating one of the leaves that we gave him. I decided to make that pic the one I would use for the painting. I gave it to her for Christmas. Here is what you need to do this project.
-Scrapbook paper (of the colors that you need)
-Mod Podge (or Gesso, which tends to hold the paper better)
-Paintbrushes
-Canvas (whatever size you would like)
-Paint colors for your background
This was the picture that I was using to make my canvas print. I printed it out on regular paper so I could try and match up the sizes. I bought some giraffe print paper, so I cut out the shape of the giraffe on that to use later.
The first thing that you want to do is paint the edges of your canvas. I painted mine a dark green to match the grass in my picture. Let dry. The next thing I did was used my Mod Podge to cover the entire canvas.
I placed my "sand" scrapbook paper over the entire canvas.
Then I painted the top half of my canvas the dark green color that I used for the sides. Let dry. I then used my Mod Podge to coat the back of the giraffe cut out from earlier.
Then I pressed this down onto my canvas.
I then took my "Coffee Bean"paper and made the dark spots in the ears and nose. I also bought "Starry Night" paper that I used that to make the twinkle in the eyes.
Next, I took some light tan colored paper to make the sides of the nose to give it some depth. I also cut out some leaves from a "Rainforest" paper. I used those to make it look like the giraffe was chewing.
Here is the finished product. Funky but cute!

Enjoy!

Wednesday, November 10, 2010

Homemade Hand Scrub

For those of you who don't know, I work at an animal hospital. I wash my hands like 40 times a day. By the end of my work week, my hands are like sandpaper. I really like all the hand scrubs that are out on the market, but hate spending $30-$40 dollars. So I went on a search for household products that would do the trick, and were inexpensive. There are a lot of scrubs out there. I have seen Sugar, Brown sugar, salt, or sea salt. They all contain different smells and flavors. Here is my at home version which was very easy to make.
-Sugar   1/2 cup
-Brown Sugar  1/2 cup
-Honey  1 Tablespoon (room temp)
-Lemon Juice  5-7 drops
-Aloe plant (I had it on hand, not needed if you don't have it)
I used Orange extract for smell, but you can use almond, cinnamon, or peppermint too!) I used about 1 teaspoon.
Vitamin E oil (if you plan on storing it.)
So, first I added my 2 sugars and "forked" them until the brown sugar was completely mixed.
Next I added my honey. You can warm the honey for about 10 seconds in the microwave if you would like your hand scrub to be warm when used. Not more than 10 seconds though, as it can become very hot!
Next, if you have aloe, go ahead and cut a piece off, and squeeze a bit of the cream into bowl. If you have a hard time, you can cut it down the middle and open the plant itself.
Next, add your scent of choice. I added the orange this time.
This is the final product.
I placed some in a little tin for storage.
You can hand these out to friends or for the holidays. I am going to hand mine out in little holiday tins. There are things that you can add to your scrub to make it last longer, since some of the ingredients need to be refrigerated. If you are not planning on using it right away, you can add some Vitamin E oil to your small batch. This will keep bacteria out. Make sure you store your scrub in an airtight plastic container, in the fridge. If you are planning on using it in the shower, keep it in a place where water will not fall ito it (high shelf, or only bring the amount you will need) since water can promote bacteria growth. Have fun making your own little concoctions!!
Enjoy!

Related Posts Plugin for WordPress, Blogger...